
Growing chives is a simple and rewarding experience that can benefit any herb garden.
Whether you’re looking to expand your existing garden or start a new one, planting chives is a great choice. With their easy-to-grow nature, chives are a versatile herb that will bring joy to any gardener.
Unlock the secrets to growing chives like a pro by following these simple steps. You can enjoy a never-ending supply of fresh, flavorful chives all season long.
6 Steps To Growing Chives
Before starting the following steps, it’s important to know:
- Chives can be planted in both spring and fall, but it’s usually best to plant them in the spring. In warmer climates, they can also be planted in the winter.
- They typically germinate in 7 to 10 days and can be harvested about 60 days after planting.
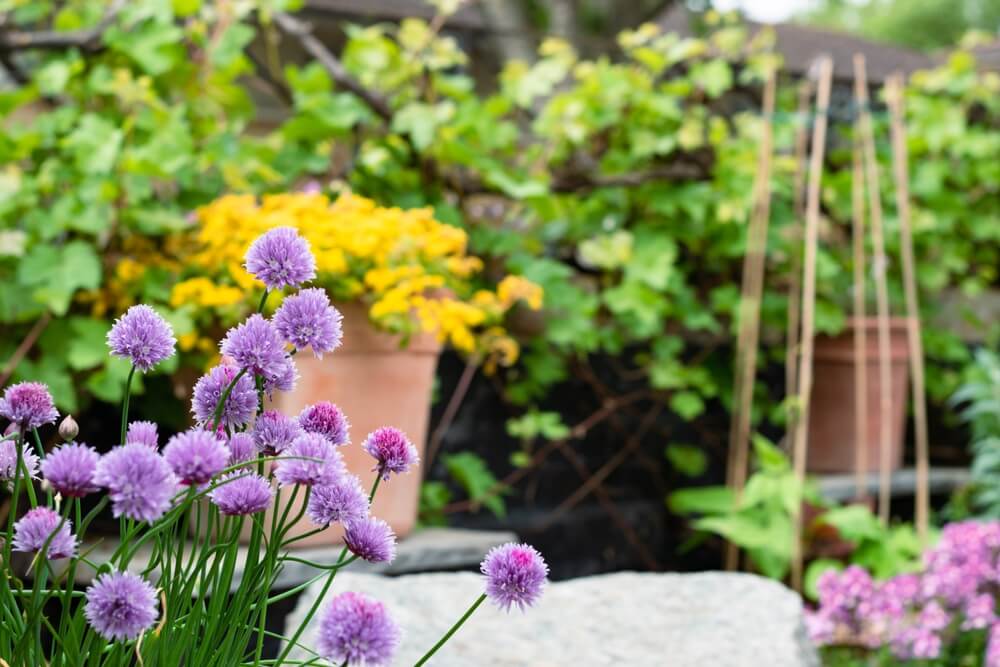
- Chives cannot only be grown for consumption but also to add colorful variety to your garden.
- Chives can produce numerous offsets, resulting in the growth of small clumps with a multitude of leaves.
- They usually flower in their second year after sowing and are considered to be most visually appealing during their third and fourth years.
1. Choose The Chives You Desire To Grow

If you’re looking for a long-lasting addition to your garden, chives are a great option since they’re a hardy perennial.
What’s more, chives are versatile in the kitchen as both their flowers and leaves are edible. You can use the blossoms to garnish vegetables, and the leaves add a delicious flavor to many recipes when chopped.
Chive Varieties
Chives come in different varieties and you can choose whichever ones you’d like to grow.
Take some time to read up about each variety to see which ones you might like best.
The best part is that they are easy to grow so you can try out as many as you’d like.
The following are examples of commonly cultivated chives.
Common Chives
- Allium schoenoprasum
- Also called Onion Chives
- Native to Europe and Asia
- Can be found growing in the wild
- Perennial
- Features slim, fresh green, and rounded hollow leaves
- Ball-shaped flower head is initially enclosed in papery bracts that are pushed away as the flowers bloom
- Mild onion flavor
- Commonly used as a garnish for meat and fish
Garlic Chives
- Allium tuberosum
- Also called Chinese Chives
- Cultivated in Asian countries
- Produce dark green, slender, flat leaves that are approximately 1/2 inch wide and up to 16 inches long, along with white flowers
- Young garlic chive leaves are typically used in recipes
- Can be consumed cooked or raw mixed with other foods
- Leaves have a milder garlic flavor
- Propagation is possible
- Excellent choice for year-round growing indoors
Giant Siberian Chives
- Allium ledebourianum
- Originally from Siberia; widely used in Russian and Ukrainian cuisine
- Have sturdy leaves that grow up to 1 to 2 feet tall and with dark green color
- Mild onion flavor
- Often used as a garnish or in salads, soups, sauces, and dressings or added to egg or potato dishes
- Flowers are also edible and can be used as a colorful garnish in salads or soups
Siberian Chives
- Allium nutans
- Also called Blue Chives
- Combination of mild onion and garlic flavors
- Upright growth with blue-green or foliage and pinkish-purple flowers that flourish in the middle of summer
- Thrive indoors with sufficient light
- Not as commonly used in cooking, nut its leaves and flowers can be used similarly to other chives
- Leaves serve as a garnish
- Flowers can also be used as an edible garnish or added to salads for a pop of color
Hybrid Chive Varieties
When shopping around for chives you may come across hybrid varieties as well.
This includes the following types:
- Monstrosum: A giant type that is primarily grown for ornamental purposes. Despite its size, it is still edible like other chive varieties.
- Profusion: A sterile hybrid that is useful for its ornamental value. It flowers over a long period, making it a great addition to any garden.
- Curly Mauve: Unlike most chives that grow upright, the Curly Mauve produces whips resembling vines that curl in all directions. It produces abundant light lavender-colored flowers.
- Snowcap: A dwarf variety that reaches 1.5 feet in height at most. It produces white flowers and is perfect for small gardens or container gardening.
- Forescate: Has bright and large lavender flowers, and grows 12 to 20 inches tall. It is a great option for adding color and texture to a garden.
- Pink Giant: Slightly larger than other cultivars of chives, but not necessarily a giant. Its spherical flower head is colored lavender that has a lighter shade with a pink-like hue.
2. Pick The Perfect Planting Spot
Typically, chives thrive best in well-draining soil and require partial shade to full sun. However, if unsure, refer to the planting instructions or find ideal growing conditions for your variety of chives online.
They can be grown in the ground, mixed with other vegetables or herbs, or in containers. Growing chives in pots provides the flexibility of moving them indoors during cooler weather.
3. Prepare Or Amend The Soil
 Chives thrive in well-drained soil with a slightly acidic to neutral pH range of 6.0 to 7.0.
In case your soil is too dense or heavy with high clay content, you may need to amend it by adding organic matter such as peat moss or compost. This will help improve drainage and aeration, which in turn promotes healthy root development and growth.
It’s also recommended to avoid planting chives in areas that are prone to waterlogging or flooding, as they prefer soil that is moist but not waterlogged.
4. Plant The Chives
Chives are able to be propagated from seeds, bulbs, or by the division of existing plants.
Seeds
Growing chives from seeds can be a bit challenging. They take longer to germinate and need constant moisture.
It’s best to sow the seeds in warm soil from March to April, about 1/2 to 3/4 inch below the soil surface.
Potting soil with sand mixed in works well, and the seeds should be spaced apart according to the seed packet’s label. After sowing, keep the soil evenly moist until the seeds germinate.
If growing from seeds indoors, do the following:
- Sow chive seeds indoors about 6 to 8 weeks before the last expected frost date.
- Fill a seed tray with potting soil, and sprinkle the chive seeds evenly over the soil surface.
- Lightly press the seeds into the soil, and cover the tray with plastic wrap to create a greenhouse effect.
- Place the tray in a warm, bright location, and keep the soil moist.
- Transplant the seedlings into your garden or in larger containers, when these seedlings have grown a few inches taller. Space them about 6 inches from one another.
Bulbs
If you prefer planting bulbs, dig holes about 3 inches deep and 4 to 6 inches spaced apart.
Carefully place each bulb into the soil with the roots downwards. Then, cover it with soil.
Ensure that the soil is well-draining to avoid waterlogging, as this can result in the rotting of bulbs.
Propagation (Division Of Existing Plants)
Chives can be easily propagated through division.
Here are the steps to propagate chives:
- Dig up the chive clump you wish to divide.
- Gently pull apart the clump into smaller sections. Each section should have a few bulbs and some foliage.
- Replant each section into a new location, spacing them about 6 inches apart. Make sure the bulbs are just below the soil surface.
- Water the newly transplanted chives well.
Container Growing
Growing chives in containers is also an option using any of the above planting techniques.
It’s easy to move them indoors when the weather cools off.
When growing in containers, use a well-draining potting mix and ensure that the container has drainage holes to prevent waterlogging.
5. Mulch, Water, Fertilize

Mulching around chives is a great way to help keep moisture in the soil, regulate soil temperature, and prevent weed growth.
An organic mulch layer, such as grass clippings, shredded leaves, or straw, should be spread evenly around the plant’s base, but be careful not to bury the foliage.
Aim for a depth of 1-2 inches of mulch. Be sure to avoid piling the mulch up against the stems of the plants, as this can promote rot and disease.
To keep chives healthy and thriving, it is important to water them regularly and ensure that the soil stays evenly moist. However, be careful not to overwater and make the soil waterlogged, as this can cause root rot.
It is also a good idea to fertilize the chives every few weeks with an all-purpose fertilizer. This encourages growth and keeps them healthy. A slow-release fertilizer can be a good option for chives grown in containers.
See below for additional care tips.
6. Harvest The Chives
As mentioned above, chives have a germination period of 7 to 10 days and can be harvested approximately 60 days after planting.
To get the best flavor, it’s recommended to harvest chives when the leaves are approximately 12 inches in height.
Use sharp scissors or shears to cut the chive leaves at the stem base.
To ensure a continued supply of chives, it’s important to leave some foliage on the plant when harvesting. This allows the chives to continue to grow quickly and stay healthy throughout the season.
When harvesting chives that have flowered, cut off the flower heads before they produce any seeds, as this helps maintain the available nutrients for growth.
Harvesting chives before they go to seed maximizes their aroma and flavor, as with other herbs.
The following are some suggestions on how you can use harvested chives:
- Chop fresh chives. Put them in salads and soup and soups.
- Garnish dishes with chopped chives in dishes such as baked potatoes or scrambled eggs.
- Mix chives into cream cheese or butter or cream cheese to create a tasty spread.
- Add chives to sour cream or guacamole dips.
- Make an easy dressing for salads. Mix chives with vinegar and oil sweetened with a little honey or sugar.
- Dehydrate chives and add them to blends of spicess.
- Chive flowers are edible and can be used in the same way as the chive leaves. They have a mild onion flavor and can add a decorative touch to salads, soups, and other dishes. Additionally, they can be used to make flavored vinegars or oils.
Chive Plant Care Tips
The following tips are helpful to give the best results when growing chives:
- Chives need consistent moisture to grow well, so be sure to water them regularly, without letting the soil become too wet or dry.
- Keep the area around the chives free of weeds to avoid competition for sunlight and nutrients.
- Monitor soil moisture and test the pH to ensure it remains slightly acidic, which chives prefer.
- Fertilize the soil lightly with mulch or a balanced fertilizer to promote growth and health.
- Regularly remove spent flowers to encourage new growth.
- Divide chive clumps every few years to rejuvenate the plants and promote continued productivity.
Wrapping Up
With just a little bit of care and attention, your chives will thrive and provide a delicious and aromatic addition to your favorite dishes.
So roll up your sleeves, dig in, and get ready to enjoy the fruits of your labor – a bountiful harvest of chives!
You May Also Like
 Alocasia Wentii Care Guide 101: Plant Tips
 Ultimate Hoya Serpens Care Guide 101
 Revealed: 3 Monstera Growth Stages To Know About (Guide)
 The 38 Best Vertical Gardening Ideas To Adorn Tiny Spaces
 Paint The Town Red: 10 Beautiful Red Flowering Trees (With Pictures)
 12 Beautiful Perennial Plants That Repel Mosquitoes
 Indiana Native Plants: 23 Stunning Plants (With Pictures)
 Hawaii Native Plants List: 9 Stunning Plants (With Pictures)
 9 Best Plants For Hanging Baskets
 7 Signs Of Grubs In Lawn (And How To Get Rid Of Them)
 12 Stunning Companion Plants For Dahlias
 17 Best Plants For Under Pine Trees (Photos & Facts)
 12 Full Sun Annuals (That Bloom All Summer)
 15 Wonderful Self-Sowing Annuals (With Photos)